
Most of the hand planes in the shop have some common characteristics, whether small or large. They have a flat base with a space that allows a blade to protrude and when pushed or pulled to take thin shavings of wood. Most planes we think of are metal, but wood planes are also popular and work in the same way except for the adjustment mechanism. While a shoulder plane is a slight exception, most planes do their work on the outer face or edge of the wood. Because shoulder planes have a blade that protrudes from three sides, it can also be used for tenons and grooves. Still, its primary function is to even up a surface.
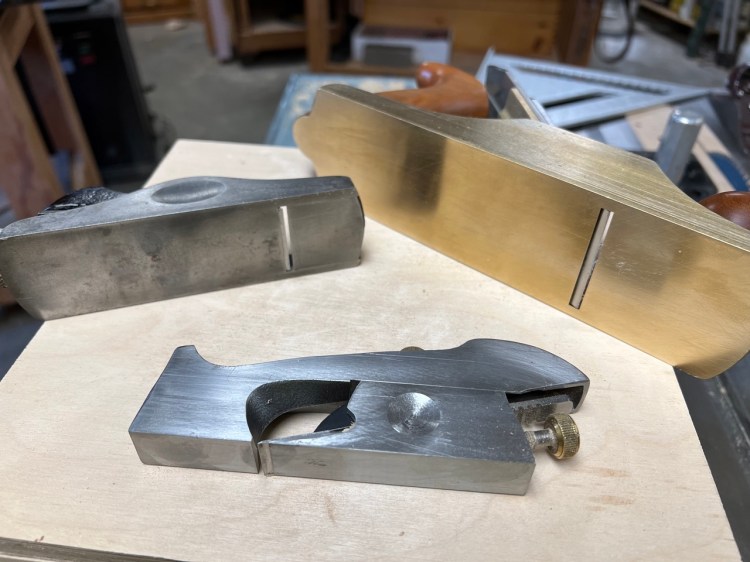
But what if the project calls for cutting beneath the surface, such as inlay, or the common need to clean the bottom of a dovetail? None of these planes work because the blade only protrudes so far—set too far and the blade cannot cut. Several years ago, I built an oak bed for Lynn and me, a big project for me at the time. Of course, the final outcome was way different from my early conception of a Craftsman style bed, but I think it turned out way better than my first musings (see my post “Glorious Mistakes”). Anyway, toward the end of the project I decided to inlay some walnut in some bowtie patterns—six of them. I did all of the inlay mortises with a chisel and wood mallet. Though they ended up very nicely, the surface beneath the walnut inlay belies what is visible.
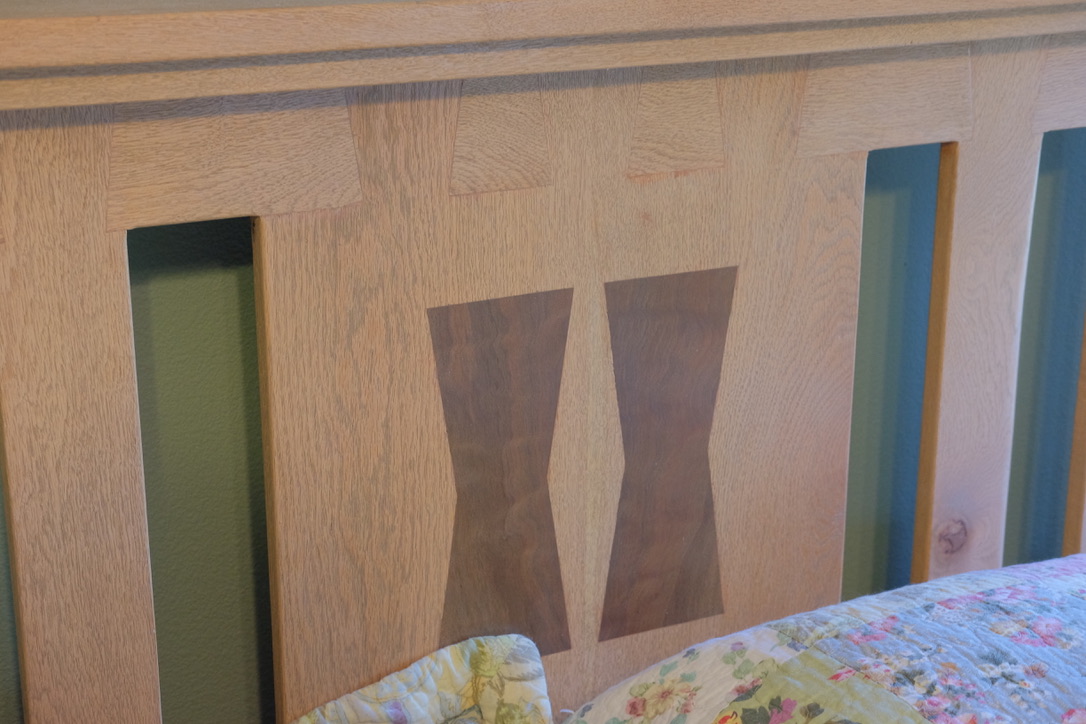

I was unable to create a flat bottom with crisp sides using just chisels. I could have created two templates and used my router, but that creates its own risks, and for only two large and four small inlays, I would have needed a chisel anyway to create sharp corners. When the project was done, I knew that I needed another tool, one that works differently from the typical plane.
Enter the plane that breaks the mold: the router plane.
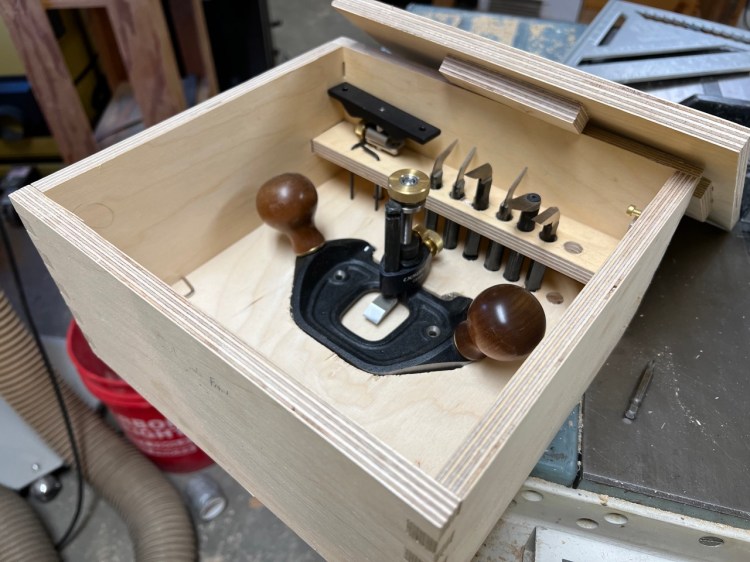
This plane works by using a blade that can be lowered beneath the surface of the wood. It is kind of like a chisel, but a chisel is too long to get horizontal in tight spaces. Instead, the router plane drops a small blade vertically from level with the surface to as far as one and a half inches below the surface for the large router plane. This allows for easy clean-out of mortises or inlay or the bottoms of dovetails. It can also form grooves and one of my favorite tasks, mortises for hinges. The ability to set an exact bottom depth that can be eased toward, makes the task easy with a virtually perfect fit. In combination with a chisel to create the outer edges of the mortise, so many tasks are made more manageable. I simply love taking it out of the case I made for it, setting it up and using it. The router plane is certainly not one that I use every day in the shop and its applications are limited. But when needed, there is nothing quite like this tool. And did I say it looks very cool.
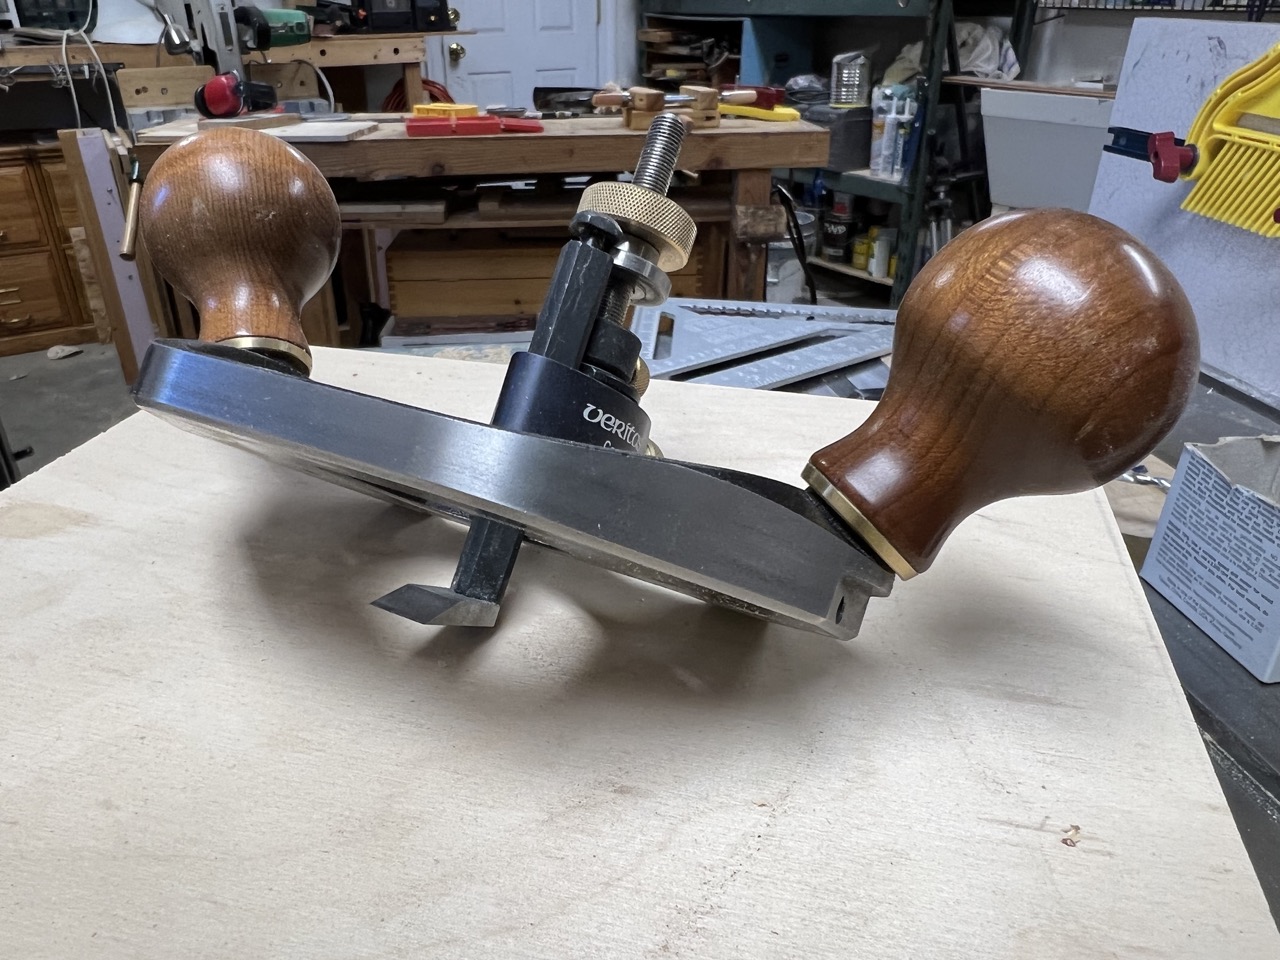
When shopping for one several years ago, I looked at two possibilities the large router planes from Lie-Neilson and Veritas . Both were obviously quality tools and both had a following. After reading the reviews, the one negative thing conveyed about the Veritas was that the blade shaft lock screw directly contacted the threads of the main adjustment bolt , unlike the Lie-Neilson. All things considered, I settled on the Veritas anyway, primarily because of the extras that came with it. I couldn’t be happier. I also picked up several blades of different widths. Come to find out, those bottom threads on the adjustment bolt are never used, so the contact is moot.
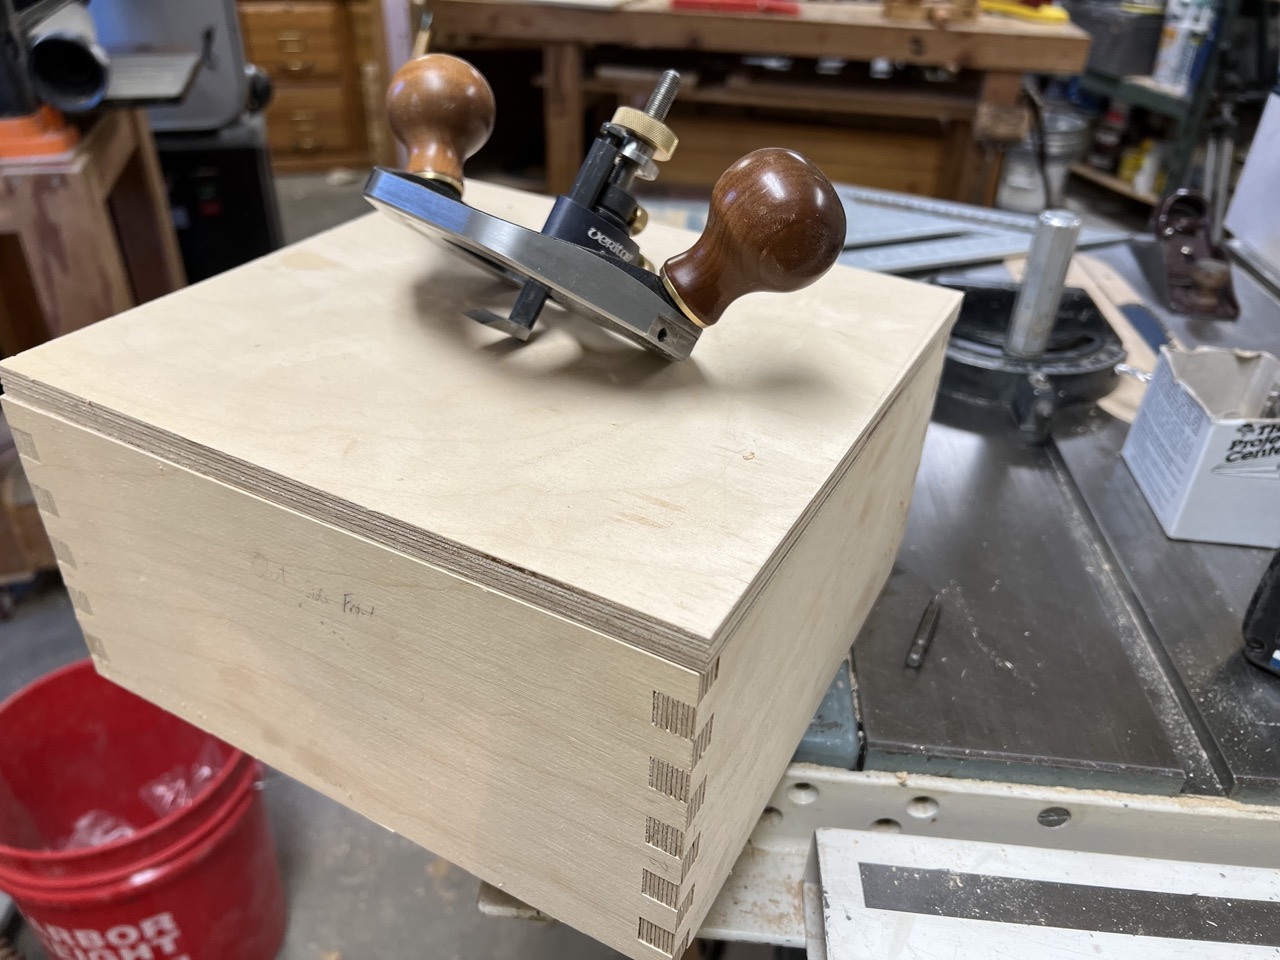
One very memorable opportunity I had to use the router plane occurred when my 90-year-old father-in-law, Don, died last summer after an illness. Before he died, he and my mother-in-law, Joanne, asked me to craft two identical funerary urns for them. It was my pleasure and delight to do so. I had some rough oak and walnut in my shop and decided to construct a rounded edge box with oak for the sides, walnut for the top, bottom, and corners, and with an inlaid but slightly embossed walnut cross on the front. The top was glued on and the bottom attached with large brass screws. For the inlay, I used the router plane for the mortises. The result was a perfectly flat mortise for the narrow cross. I couldn’t have been more pleased, and Joanne loved the result.

